FR: Je
suis une folle de bracelets !! J’adore porter PLEINS de bracelets de toute les
couleurs peu importe la saison. Et ce que j’aime encore plus c’est de pouvoir
les faire moi-même. Alors voici mon premier DIY super simple, rapide et pas
cher (on utilise pas mal juste des choses qu’on a déjà chez soi !!).
J’adore ces bracelets car on peut les
porter toute l’année et on peut vraiment faire ce qu’on veut. Laisser notre
inspiration prendre le contrôle !!
Vous aurez besoin de:
-Une paire de ciseau
-Du fil (plein de couleurs)
-Des bracelets que vous n'aimez plus (sinon vous
pouvez en acheter au magasin 1$ ou ailleurs)
-Du vernis transparent (moi j'ai utilisé mon vieux
top coat Essie)
EN: I am a crazy about
bracelets!! I love wearing FULL of bracelets of lots of colors no matter the
season. And what I like even more it’s to be able to make them myself. So here
is my first DIY very simple, fast and cheap (we use not
bad just things which we already have at home!!).
I adore these bracelets because we can wear them all year long and we
can really make what we want. Let our inspiration take the control!!
You will need:
-A pair of cisor
-Thread (full of colors)
- Bracelets which you do not like any more (otherwise you can buy them at 1$ shop or anywhere else)
- Some transparant nail polish (I used my old top coat Essie)
- Bracelets which you do not like any more (otherwise you can buy them at 1$ shop or anywhere else)
- Some transparant nail polish (I used my old top coat Essie)
Étape 1 | Step 1
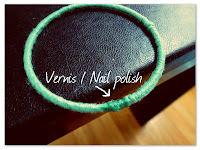
FR: Commencez en mettant un peu de vernis sur votre bracelet et coller le bout du fil dessus. Ajouter une couche pardessus le fil afin d'être sur de l'avoir bien collé. Ensuite faite un nœud et commencer à enrouler votre fil pardessus le bout de fil coller.
EN: Begin by putting a little amount of nail polish on your bracelet and stick the end of the
thread above. Add a coat over the thread to be sure it is well stick. Then make a knot and begin to roll up your thread on the bracelets by passing over the thread covered by nail polish.
Étape 2 | Step 2
FR: Enroulez le fil autour du bracelet très serré. Aussi simple que ça!! ;)
EN: Roll up the thread around the bracelet really tight. Simple as that!! ;)
Étape 3 | Step 3
FR: Quand vous avez rejoins l'autre côté, faites trois nœud afin que le fil reste en place.
EN: When you join the other side, make three node so that the wire remains in place.
Étape 4 | Step 4
FR: La dernière étape consiste à mettre du vernis sur les trois nœuds que vous avez fait à l'étape 3 et laissez sécher le tout.
EN: The last step is to put the nail polish on the three knots that you made in step 3 and allow everything to dry.

FR: Voilà c'est tout!! J'espère que vous avez aimé ce DIY! Si vous avez des questions ou des commentaires n'hésitez pas :)
EN: That's it! I hope you enjoyed this DIY! If you have questions or comments please do not hesitate :)
💙


